
led screen testing screen roblox: 10 : Complete Guide
Introduction
In this guide, you will learn what it means, why it matters, how to build and test virtual screens effectively, which common issues to watch for, and how to optimize performance without sacrificing visual impact. By the end, you will have a clear framework for planning, testing, and improving Roblox screen systems.
Table of Contents
- Introduction
- What Is led screen testing screen roblox?
- Why led screen testing screen roblox Matters for Game Quality
- 1. Better readability
- 2. Stronger immersion
- 3. Improved performance
- 4. Cleaner communication
- 5. Cross-platform reliability
- How to Build and Run led screen testing screen roblox Effectively
- Plan the screen’s purpose
- Choose the right implementation
- Test size and viewing distance
- Check brightness and contrast
- Validate scripts and content rotation
- Test with real users
- Common Problems Found During led screen testing screen roblox
- Blurry or stretched visuals
- Text that is too small
- Lag from too many updates
- Poor color balance
- Inconsistent appearance across devices
- Misaligned content
- Visual clutter
- Best Practices to Optimize led screen testing screen roblox
- Keep designs simple and bold
- Reuse assets intelligently
- Limit animation intensity
- Optimize for performance first
- Use environment-aware styling
- Prioritize important information
- Review player behavior
- Build a staged testing routine
- FAQ
- What does led screen testing screen roblox actually involve?
- Why is led screen testing screen roblox important for mobile players?
- What tools are commonly used for led screen testing screen roblox?
- How can I improve performance during led screen testing screen roblox?
- How often should I perform led screen testing screen roblox?
- Conclusion
What Is led screen testing screen roblox?
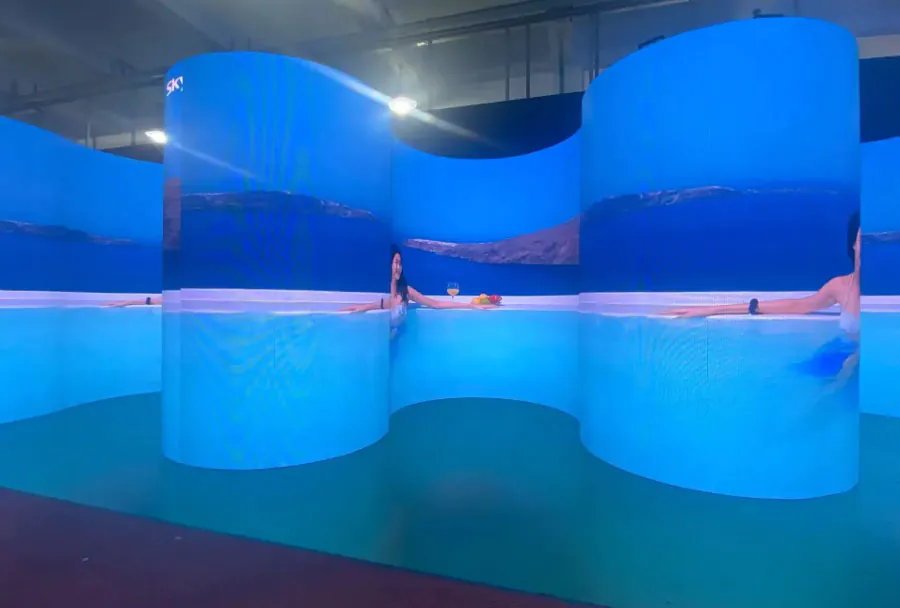
At its core, led screen testing screen roblox refers to the process of creating, previewing, and refining LED-like display elements inside Roblox experiences. These displays may appear as scoreboards, ad boards, arena panels, live event backdrops, UI-linked information walls, or decorative animated signage. Since Roblox uses a game engine with performance limits, testing is essential before deploying any advanced visual display.
When developers talk about led screen testing screen roblox, they are often referring to several things at once:
– Checking brightness and readability
– Reviewing image or video-like animation quality
– Making sure text fits correctly on the display
– Confirming the screen works across devices
– Preventing lag from heavy visual effects
– Testing scripts that control the content shown
A Roblox LED display is different from a real-world LED panel, but the design goals are similar. You want the content to be clear, vibrant, responsive, and well integrated into the environment. In Roblox, this usually involves parts, SurfaceGui elements, decals, textures, ViewportFrames, scripts, or custom animation systems.
Many creators underestimate the need for the concept until players start reporting issues. A screen that looks perfect on desktop may appear distorted on mobile. Text may become unreadable at certain distances. Effects may seem too bright in darker maps. Animation loops may stutter if too many scripts run at the same time. Testing avoids these problems early.
This process also helps with consistency. If your game includes multiple displays, each one should follow similar standards for resolution, color balance, animation speed, and messaging clarity. Testing ensures that every display contributes to the user experience rather than distracting from it.
Why led screen testing screen roblox Matters for Game Quality
Good visuals can make a Roblox experience feel more professional, and the approach plays a major role in that polish. Players often notice signage, status boards, and event screens immediately after entering a game. These visual elements guide attention and communicate atmosphere.
Here are some of the biggest reasons testing matters:
1. Better readability
A virtual LED screen is only useful if players can actually read it. Fonts that are too small, color combinations with weak contrast, or poorly spaced layouts can make a display ineffective. Testing lets you view the screen from different distances and camera angles.
2. Stronger immersion
A stadium, nightclub, shopping district, or futuristic city feels much more believable when screens behave properly. led screen testing screen roblox helps creators align the display style with the environment. Smooth transitions, balanced colors, and logical content all improve immersion.
3. Improved performance
Too many animated textures, frequent UI updates, or overly complex scripts can hurt frame rate. Testing helps identify performance bottlenecks before your game goes live. This is especially important for mobile players, who often have lower-end hardware.
4. Cleaner communication
Screens often display instructions, timers, event schedules, promotions, warnings, or roleplay information. If these messages are delayed, clipped, or unreadable, the player experience suffers. Testing ensures communication stays clear and timely.
5. Cross-platform reliability
Roblox is played on PC, mobile, tablet, and console. A design that works well on one platform may fail on another. this should include checking how displays look and behave across different device types.
Another reason this matters is branding. If you are building a community game, social hub, simulator, or hosted event space, high-quality digital displays make the environment feel organized and modern. Players associate smooth presentation with trust and quality.
How to Build and Run led screen testing screen roblox Effectively
To get the best results from it, you need a structured workflow. Testing should not happen only at the very end of development. Instead, it should be part of design, building, scripting, and optimization.
Plan the screen’s purpose
Before building anything, define exactly what the screen is meant to do. Ask yourself:
– Is it decorative or functional?
– Will it show static text or animated content?
– Will players view it from far away or up close?
– Is it part of gameplay, navigation, or atmosphere?
Purpose affects everything from size to brightness to script complexity. A giant concert backdrop needs different testing compared with a small info panel near a shop.
Choose the right implementation
Roblox creators can simulate screens in several ways:
– SurfaceGui for text and image-based displays
– Decals or textures for static visuals
– BillboardGui for floating signs
– ViewportFrame for advanced visual elements
– Scripted frame animation for changing content
– Lighting and neon materials for glow effects
As part of led screen testing screen roblox, compare your implementation choices based on quality and performance. The simplest option that achieves your goal is often the best one.
Test size and viewing distance
A common mistake is designing the screen while standing very close in Studio. In actual gameplay, players may see it from much farther away. Check whether text remains readable and whether key graphics still make sense at realistic distances.
Useful tests include:
– Near-distance readability
– Mid-distance recognition
– Long-distance visibility
– Side-angle distortion checks
– Camera motion during movement
Check brightness and contrast
Many creators try to mimic LED intensity by using very bright colors or neon effects. This can work, but too much brightness can wash out text or feel visually harsh. Test the display in daytime, nighttime, indoor, and low-light conditions if your game uses changing lighting.
For better results:
– Use high-contrast color combinations
– Avoid overly saturated backgrounds behind text
– Limit flashing effects
– Keep animation smooth rather than chaotic
Validate scripts and content rotation
If your display changes messages, cycles ads, or reacts to game events, script testing becomes critical. Make sure content updates correctly, loops at the right speed, and does not trigger errors when players join or leave.
A useful the concept checklist for scripts includes:
– Does the first message load properly?
– Does the cycle repeat without freezing?
– Is the update timing consistent?
– Do multiple screens stay synchronized if needed?
– Do server and client behaviors work as expected?
Test with real users
Studio testing is important, but player testing is better. Invite a small group to join your experience and observe whether they notice the screen, understand the message, and experience any lag. They may point out readability issues you missed.
Common Problems Found During led screen testing screen roblox
Even experienced developers run into problems during the approach. The good news is that most issues are fixable once identified early.
Blurry or stretched visuals
This often happens when images are uploaded at the wrong dimensions or when the display surface is resized without respecting the content ratio. Fixing aspect ratio problems can dramatically improve quality.
Text that is too small
A screen may look detailed in Studio but fail in gameplay. If players need to stop and zoom in just to read it, the design is not effective. Use larger fonts, shorter messages, and stronger contrast.
Lag from too many updates
Rapidly changing GUI elements or multiple screens running separate loops can cause unnecessary performance strain. Consolidate scripts where possible and reduce refresh frequency if real-time updates are not required.
Poor color balance
One of the most common it issues is overly bright neon styling. While the LED look is desirable, too much glow can make content difficult to interpret. Focus on readability first and style second.
Inconsistent appearance across devices
Mobile users may see scaling differences, cut-off UI, or weaker performance. Always test on multiple screen sizes if your game depends on digital displays for information delivery.
Misaligned content
Text labels, frames, and images may shift if anchors, scaling, or UI constraints are not set properly. Responsive layout planning is important, especially if your screen changes content dynamically.
Visual clutter
Some creators overload displays with moving text, icons, borders, gradients, and animated backgrounds. Real LED boards can be flashy, but in Roblox, too much motion can confuse players and lower performance. Keep the message focused.
To solve these problems efficiently, create a repeatable test log. Write down:
– What screen was tested
– Whichevice or view was used
– What issue appeared
– How serious it was
– What fix was applied
That simple habit makes this much easier to manage as your project grows.

Best Practices to Optimize Roblox LED display testing
If you want professional-looking results, follow best practices consistently. these is not just about spotting errors. It is also about building a process that improves quality over time.
Keep designs simple and bold
LED-style displays work best when the content is clear. Use short lines of text, large type, and strong visual hierarchy. Avoid trying to fit too much information on a single panel.
Reuse assets intelligently
Instead of creating unique scripts and graphics for every display, build reusable systems. Shared templates save time, reduce bugs, and make it easier to update multiple screens at once.
Limit animation intensity
Animation should support the message, not overpower it. Subtle transitions, controlled scrolling, and timed fades usually work better than constant flashing or rapid movement.
Optimize for performance first
During they, always ask whether a visual feature is worth the performance cost. If a simpler effect delivers nearly the same impression, choose the lighter option.
Use environment-aware styling
A bright cyberpunk city may justify vivid color and heavy glow. A realistic school, mall, or office setting may need softer display visuals. Match the screen style to the world around it.
Prioritize important information
If a display contains game-critical instructions, place those messages in the largest and clearest area. Decorative content should never compete with gameplay information.
Review player behavior
Watch how players interact with your space. Do they stop to read the screen? Are they ignoring it entirely? Do they miss directions that are supposedly obvious? Real behavior tells you whether your display is effective.
Build a staged testing routine
A strong workflow might look like this:
- Create the screen prototype
- Test static readability
- Add animation or scripting
- Test performance impact
- Check different lighting conditions
- Test on multiple devices
- Gather user feedback
- Apply revisions and retest
This kind of repeatable system helps ensure the concept produces reliable, polished results every time.
FAQ
What does led screen testing screen roblox actually involve?
Roblox LED display testing involves checking how a virtual LED-style display looks and performs inside a Roblox experience. That includes readability, animation smoothness, script stability, brightness, scaling, and device compatibility.
Why is led screen testing screen roblox important for mobile players?
Mobile devices often have smaller screens and lower performance capacity than PCs. Roblox LED display testing helps ensure your displays remain readable and do not create lag or layout problems for mobile users.
What tools are commonly used for led display testing screen roblox?
Most creators use Roblox Studio, Play Test mode, SurfaceGui settings, UI scaling tools, custom scripts, and multiplayer testing sessions. The best led video wall testing screen roblox process combines visual inspection with real gameplay testing.
How can I improve performance during led screen testing screen roblox?
Reduce unnecessary animation, simplify scripts, reuse display systems, compress assets where possible, and avoid overly frequent updates. In many cases, optimization is the most valuable part of led video wall testing screen roblox.
How often should I perform led screen testing screen roblox?
You should test whenever you add a new display, change screen content, adjust lighting, or update scripts. Regular led video wall testing screen roblox prevents small display issues from becoming larger gameplay problems later.
Conclusion
A high-quality screen system can make a Roblox experience feel modern, immersive, and well organized, but only if it is carefully refined. That is why led video wall testing screen roblox should be treated as a core part of development rather than an optional final step. From readability and color balance to script behavior and device compatibility, every detail affects how players experience your world.
By using a structured workflow, testing from multiple distances, optimizing for performance, and collecting player feedback, you can turn simple display elements into standout features. In the end, it is about more than visuals alone. It is about delivering clear communication, stronger immersion, and a smoother experience for every player who enters your game.
