How to Replace Outdoor SMD LEDs on an LED Display


Outdoor LED displays face sun, rain, vibration, dust, and temperature swings, so failed pixels are a normal part of maintenance. Knowing how to replace damaged SMD LEDs is a practical skill that can save time, reduce service costs, and extend the life of the entire screen. This guide explains the process in plain language, from diagnosis to final testing, so you can work safely and avoid common mistakes. If you are new to How to Replace Outdoor SMD LEDs on an LED Display, the biggest lesson is that speed matters less than accuracy. A careful repair protects nearby components, preserves color consistency, and maintains weatherproofing. By the end, you will know what tools to use, how to remove a faulty LED, and how to confirm that the repaired module performs properly outdoors.
Diagnose the Damage and Gather the Right Tools
When you begin How to Replace Outdoor SMD LEDs on an LED Display, the first task is to confirm that the problem is truly a single LED and not a larger issue such as a bad driver IC, a damaged cable, or a failed power rail. Outdoor screens often show symptoms that look like dead LEDs but are actually caused by moisture, corrosion, or data transmission faults. A pixel that is dark, flickering, wrong-colored, or intermittently lit should be inspected in context with the surrounding cluster.
Check the full module before touching anything
Before opening the cabinet, observe the display from a distance and then up close. Look for patterns:
– A single dark dot may indicate one failed SMD LED.
– A vertical or horizontal line of failures may point to a ribbon cable or scan line problem.
– A whole section with color shift or dimness can suggest a board-level fault.
– Random flicker after rain often indicates water ingress or corrosion.
If you are planning How to Replace Outdoor SMD LEDs on an LED Display, this first inspection can prevent unnecessary soldering. It also helps you avoid replacing good parts when the real problem is elsewhere.
Shut down safely and protect the site
Outdoor display service usually means working on elevated structures, rooftops, roadside cabinets, or stadium installations. That means safety comes before repair speed. Power down the affected cabinet or module, lock out the supply if possible, and verify that residual voltage has discharged. Use fall protection, non-slip footwear, and a stable work platform. If the display is part of a live advertising schedule, communicate with the operator so the affected area is disabled before work begins.
A disciplined approach to How to Replace Outdoor SMD LEDs on an LED Display also includes personal protection. Use ESD precautions for the module, because static discharge can damage neighboring LEDs, receiver boards, and driver chips. A grounded wrist strap, ESD mat, and antistatic container for replacement parts are worth the setup time.
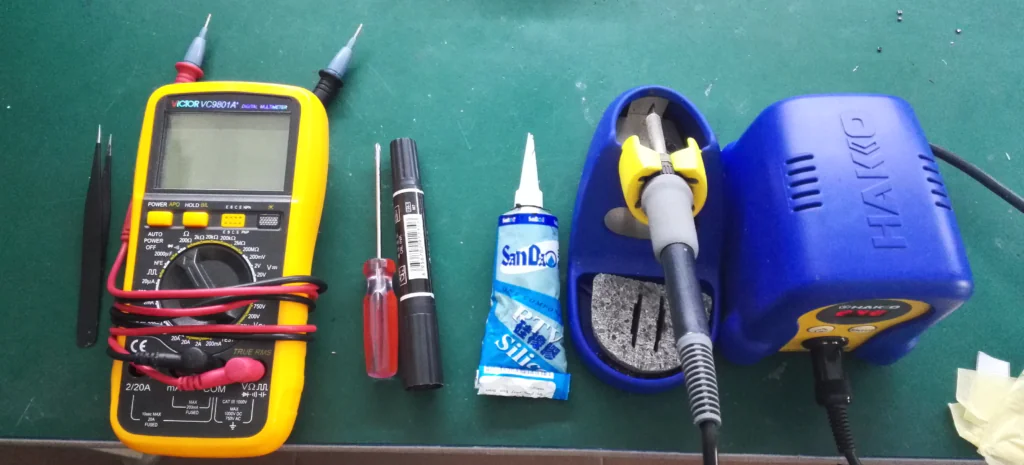
Assemble the right tools and materials
Good tools make the repair cleaner and reduce the chance of lifting pads or overheating the board. Prepare:
– Temperature-controlled soldering iron
– Hot air rework station or precision LED rework tool
– Fine tweezers
– Flux pen or no-clean liquid flux
– Solder paste or fine solder wire, depending on your method
– Microscope or strong magnification
– Kapton tape or heat shielding
– Isopropyl alcohol and lint-free swabs
– Matching replacement SMD LEDs
– Multimeter and, ideally, an LED test board
For anyone learning How to Replace Outdoor SMD LEDs on an LED Display, the replacement LED must match the original package size, brightness bin, wavelength, viewing angle, and polarity. A part that is physically compatible but visually mismatched can create a noticeable bright or dull spot that remains visible from the street.
Match the component to the display technology
Outdoor displays commonly use RGB SMD packages mounted on modules with solder mask openings and protective coatings. Some modules use common-anode arrangements, while others use different pixel architectures. Check the module documentation if available, or compare the failed part with a known-good LED from the same board. Photograph the orientation before removal so you can verify the cathode and anode alignment later.
One reason How to Replace Outdoor SMD LEDs on an LED Display should be handled methodically is that outdoor modules often look identical across several product revisions while using slightly different LEDs or solder mask layouts. Never assume the part is correct just because it fits the footprint. Confirm the package, emissive color, and electrical rating before you begin.
Remove and Replace the Failed Outdoor SMD LED
Example: Repairing instruction of P6.66
1. Test the modules and find the faulty dot and use a marking pen.

2. Use a screw driver to take down all the screws and then take down the mask.
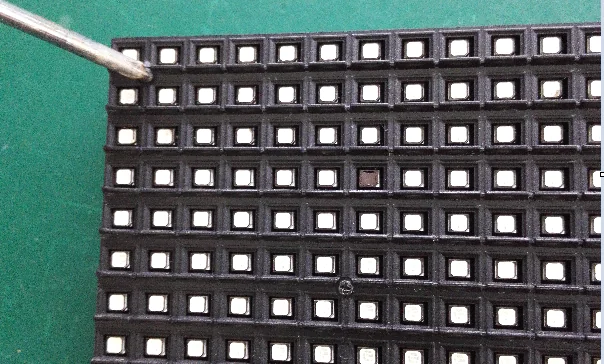

3. Scrap the glue clearly.

4. Use a electric soldering iron (the temperature around 300℃) to take down the faulty LEDs.

5. After taking down the faulty leds add some soldering tin to the four legs.


6. Use a tweezers to hold a lamps and put it to the position and pay attention to the direction.

7. At the same time use the soldering iron to fix the led and press it softly to make a better connection between the leds and the PCB board.

8. After fixing the leds add some soldering tin to the opposite legs to connect them well.
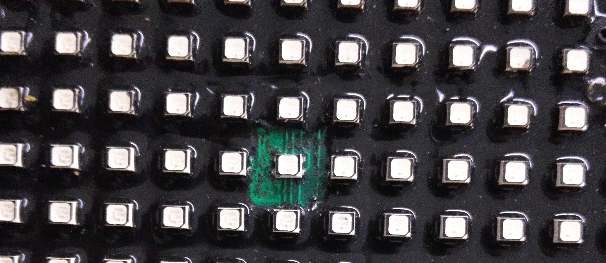
9. Test the module to see whether the faulty leds have been replaced successfully, if the module works fine then we need to put the glue back to prevent the water coming in!
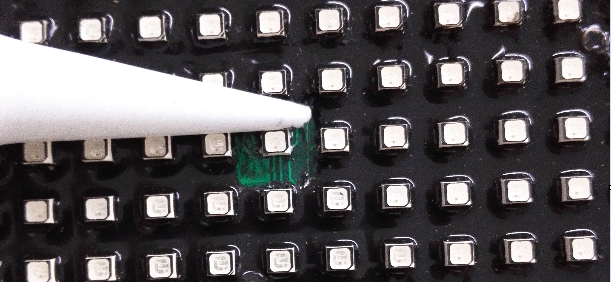
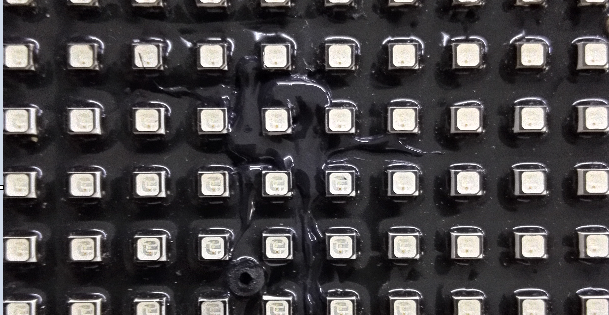
10. Cover the mask and put all the screws back!
FAQ
Can I replace just one SMD LED instead of the whole module?
Yes, in many cases you can, especially when the failure is isolated and the board is otherwise healthy. For How to Replace Outdoor SMD LEDs on an LED Display, single-component repair is often the most cost-effective option when the pads are intact and the display uses accessible SMD parts. If the board shows corrosion, multiple failures, or damaged traces, replacing the module may be a better long-term choice.
What if the new LED lights but looks different from the others?
That usually means the replacement bin, wavelength, or brightness rating does not match the original part closely enough. In How to Replace Outdoor SMD LEDs on an LED Display, visual matching matters as much as electrical compatibility. Check the package specification, compare the color temperature, and verify that the module is not being affected by a weak driver channel or partial solder connection.
How do I know if the problem is not the LED itself?
If multiple pixels fail in a line, if the fault changes when you tap the board, or if the area is dark only during certain content, the issue may be elsewhere. When people ask about How to Replace Outdoor SMD LEDs on an LED Display, the most common mistake is assuming every dark pixel is a dead LED. Inspect the driver ICs, ribbon cables, connectors, and power supply before soldering.
Is it safe to use hot air on outdoor LED modules?
Yes, if you control the temperature and protect nearby parts. A careful repair in How to Replace Outdoor SMD LEDs on an LED Display usually uses moderate heat, brief exposure, and proper shielding. Excessive heat can lift pads, warp the PCB, or damage nearby LEDs, so patience is important.
Conclusion
How to Replace Outdoor SMD LEDs on an LED Display is a repair task that rewards patience, clean technique, and careful testing. If you diagnose the fault correctly, use the right tools, protect the board from heat and static, and verify the result under real operating conditions, you can restore the display without unnecessary downtime. The best repairs are the ones that blend into the screen, survive weather exposure, and hold up long after the first power-on.