Hotel Front Desk LED Display Integration: How to Avoid Visible Gaps, Uneven Surfaces, and Exposed Frames

Hotel Front Desk LED Display Integration: How to Avoid Visible Gaps, Uneven Surfaces, and Exposed Frames starts by treating the display as an architectural finish, not a television added after construction.
Table of Contents
- 1. Define the Finished LED Plane Before Fabrication
- Set measurable acceptance criteria
- Coordinate the surrounding finishes
- 2. Survey and Correct the Supporting Structure
- Create a measurement grid
- Design adjustability into the mount
- 3. Install, Test, and Align in Controlled Stages
- Build from a verified reference
- Evaluate the screen from guest positions
- 4. Conceal Edges Without Blocking Access or Accessibility
- Use a controlled shadow reveal
- Protect circulation and counter access
- 5. Commission the Display Under Real Operating Conditions
- Inspect more than color
- Preserve the final settings
- Can an LED display follow a curved reception desk?
- Can an existing stone front desk support the LED cabinets?
- Why does the display look correct to guests but uneven on camera?
- How should hotel staff clean the display surface?
- Who should approve the completed front desk display?
- Conclusion
One useful benchmark shows how precise the work can be: a Leyard installation manual specifies display-unit clearance and framework error of no more than 0.1 millimeter for its TW Series system. (planar.com)
Guests view a reception desk from short distances and changing angles. Small cabinet offsets, dark seams, protruding trim, and inconsistent reflections are therefore easier to notice than they would be in a ballroom or distant signage application.
Preventing these defects requires coordination among the architect, millworker, structural contractor, electrician, and LED integrator before fabrication begins. The five steps below cover tolerance planning, wall preparation, installation sequencing, frame concealment, accessibility, and final commissioning.
1. Define the Finished LED Plane Before Fabrication
The finished display plane must be documented before anyone builds the desk, wall, or decorative enclosure. Without one shared reference plane, each trade may work accurately while producing an uneven final assembly.
Set measurable acceptance criteria
Hotel Front Desk LED Display Integration: How to Avoid Visible Gaps、 Uneven Surfaces and Exposed Frames should have written tolerances for three separate conditions:
– X-axis gaps: Vertical spaces between adjacent cabinets or modules
– Y-axis gaps: Horizontal spaces between rows
– Z-axis steps: One cabinet or module sitting forward of another
Do not use broad instructions such as “make the screen seamless.” Record the manufacturer’s cabinet, module, mounting-frame, and alignment tolerances in the approved shop drawings.
TW VISION’s published display-quality criteria use LED pitch deviation of no more than 5% for seam gaps and step differences of no more than 5% for flatness. These are useful reference points, but the selected product’s installation manual and warranty conditions must govern your project. (WWW.CSTWVISION.COM)
Coordinate the surrounding finishes
Show the LED face, trim return, countertop edge, ventilation cavity, service path, and finished wall on the same enlarged section. Include the real thickness of stone, metal, wood veneer, adhesive, substrate, and mounting hardware.
Consider a stone fascia designed from nominal cabinet depth. If the mounting frame later requires shims, the LED surface may project beyond the stone even though both installers followed their own drawings.
For Hotel Front Desk LED Display Integration: How to Avoid Visible Gaps、 Uneven Surfaces and Exposed Frames, require a full-size corner or edge mockup whenever the display meets premium millwork.
How to apply this: Add X-, Y-, and Z-axis tolerances to the shop drawings and obtain written approval from the LED manufacturer and millworker.
2. Survey and Correct the Supporting Structure
A level display cannot be built reliably on an unmeasured or flexible supporting surface. The wall, steel frame, or desk structure must be surveyed as a plane rather than checked at only four corners.
Create a measurement grid
Establish a project datum and record wall depth at regular horizontal and vertical points. Compare every reading with the intended LED face plane, then identify high points before installing brackets.
Useful field tools include:
| Tool | Primary purpose | What to check |
|---|---|---|
| Bosch BLAZE GLM165-27C | Distance measurement | Widths and diagonals |
| Leica Lino | Level and plumb lines | Mounting-rail alignment |
| Fluke 62 MAX+ | Surface temperature | Cabinet heat patterns |
The Bosch model is specified with accuracy up to ±1/16 inch, while Leica describes its Lino emitters as self-leveling through a pendulum mechanism. These tools help document conditions, but fine cabinet seams still require manufacturer alignment gauges and direct physical checks. (boschtools.com)
Design adjustability into the mount
Hotel Front Desk LED Display Integration: How to Avoid Visible Gaps、 Uneven Surfaces and Exposed Frames needs independent adjustment for horizontal position, vertical position, and depth. A mount that allows only left-right movement cannot correct Z-axis steps.
Use engineered rails, adjustment screws, or manufacturer-approved shims. Do not build deep stacks of miscellaneous washers, which can loosen or concentrate loads.
A common scenario is a gypsum wall that appears flat under normal lighting but changes depth across several framing bays. Correct the backing or mounting system instead of forcing cabinets against the wall.
For Hotel Front Desk LED Display Integration: How to Avoid Visible Gaps、 Uneven Surfaces and Exposed Frames, require structural sign-off when the assembly is supported by millwork rather than the building structure.
How to apply this: Survey the complete mounting area, mark every out-of-plane location, and correct the substrate before unpacking LED modules.
3. Install, Test, and Align in Controlled Stages
The safest installation sequence establishes one accurate reference row and expands from it gradually. Installing the entire wall before testing can turn one alignment error into a full-screen correction.
Build from a verified reference
Samsung’s installation guidance instructs installers to begin the first cabinet row from the lower-left end, connect power and signal after completing a line, and check cabinet gaps and direction before continuing. (eu.community.samsung.com)
Hotel Front Desk LED Display Integration: How to Avoid Visible Gaps、 Uneven Surfaces and Exposed Frames should follow the selected manufacturer’s sequence, but the working principle remains consistent:
- Set and verify the mounting frame.
- Install the reference cabinet or bottom row.
- Check level, plumb, diagonals, and depth.
- Energize the completed section.
- Display black, white, red, green, blue, and grid patterns.
- Correct mechanical seams before adding more rows.
Mechanical alignment should come before electronic calibration. Brightness correction may disguise a dark line in one image, but it cannot remove a physical shadow caused by a recessed cabinet.
Evaluate the screen from guest positions
Pixel pitch affects how easily guests see pixel structure and module boundaries. LG recommends approximately 1 millimeter of pixel pitch for every 5 feet of viewing distance as a planning guideline and suggests assessing the audience from one-third of the way into the viewing area. (lg.com)
In one case, an alignment that looks acceptable directly in front of the desk may reveal a raised module when viewed from the queue entrance. Check the display from standing, seated, and accessible-counter positions.
Hotel Front Desk LED Display Integration: How to Avoid Visible Gaps、 Uneven Surfaces and Exposed Frames also requires testing under actual lobby lighting, not only under temporary construction lamps.
How to apply this: Approve the first illuminated row before continuing, then repeat mechanical and image tests after every completed section.
4. Conceal Edges Without Blocking Access or Accessibility
A successful perimeter detail hides the mounting structure while preserving ventilation, module removal, and code-compliant circulation. Permanent trim should never become an obstacle to servicing the display.
Use a controlled shadow reveal
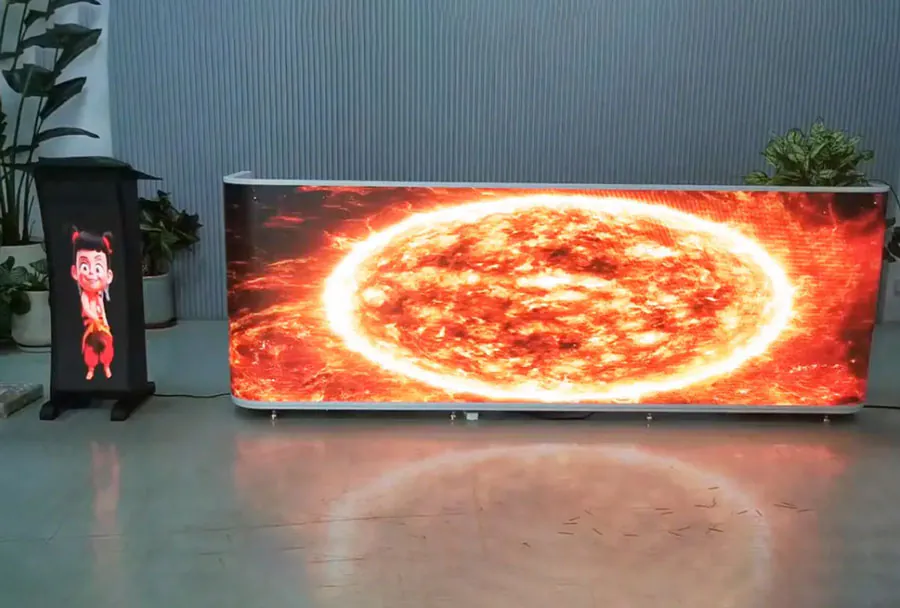
For Hotel Front Desk LED Display Integration: How to Avoid Visible Gaps、 Uneven Surfaces and Exposed Frames, a narrow dark reveal is usually more forgiving than forcing stone, wood, or metal tightly against the active pixels. The reveal absorbs small construction variations and protects delicate edge LEDs from direct contact.
The perimeter detail should account for:
– Manufacturer-required expansion clearance
– Front-removal tool access
– Air intake and exhaust paths
– Cable bend radius
– Removable side or top panels
– Replacement-module handling space
Use matte black surfaces behind reveals so internal hardware does not reflect lobby lighting. Avoid reflective stainless steel immediately beside the image unless the visual effect has been tested with live content.
Protect circulation and counter access
The U.S. Department of Justice’s 2010 ADA Standards for Accessible Design state that qualifying objects “shall protrude 4 inches (100 mm) maximum horizontally into the circulation path.” The rule applies to leading edges located more than 27 inches and no more than 80 inches above the finished floor. (ada.gov)
ADA guidance also describes accessible service-counter portions no higher than 36 inches, with dimensional requirements determined by whether the approach is parallel or forward. Display frames, ventilation covers, and service doors must not obstruct that usable area. (ada.gov)
For Hotel Front Desk LED Display Integration: How to Avoid Visible Gaps、 Uneven Surfaces and Exposed Frames, have the project architect verify current federal, state, and local requirements.
How to apply this: Detail a removable matte-black perimeter reveal and confirm that no trim, frame, or open service panel encroaches on required access routes.
5. Commission the Display Under Real Operating Conditions
Commissioning must test both the image and the physical installation after the lobby reaches normal lighting and temperature. A screen that looks uniform during construction may behave differently once decorative fixtures, HVAC, and daily content are operating.
Inspect more than color
Hotel Front Desk LED Display Integration: How to Avoid Visible Gaps、 Uneven Surfaces and Exposed Frames should be evaluated with several test conditions:
– Black content for exposed frames and reflective gaps
– White content for brightness and color consistency
– Fine grids for cabinet position and image mapping
– Slow horizontal movement for processing artifacts
– Low-gray images for weak pixels and module variation
– Typical hotel content for text size and viewing comfort
Check the screen when it is cold and again after a sustained operating period. The Fluke 62 MAX+ can support a comparative thermal survey; its official specifications list accuracy of ±1°C or ±1% of the reading under defined conditions at temperatures of 0°C or higher. Emissivity and measurement distance must be set appropriately. (assets.fluke.com)
Preserve the final settings
Photograph each edge and seam, record controller settings, save calibration files, and document cabinet serial numbers. Keep approved alignment tools and spare modules in a protected location.
Samsung notes that display panels may need periodic realignment because of external factors such as building movement, settlement, and vibration. This makes a documented baseline important for warranty discussions and future maintenance. (samsung.com)
A practical final test is to switch off the LED image while leaving lobby lighting on. Exposed rails, shiny screws, uneven black levels, and poorly finished reveals are often easier to see in this condition.
For Hotel Front Desk LED Display Integration: How to Avoid Visible Gaps、 Uneven Surfaces and Exposed Frames, require joint acceptance by the AV integrator, general contractor, and design representative.
How to apply this: Save a photographic, thermal, mechanical, and software baseline before the hotel accepts the installation.
Frequently Asked Questions About Hotel Front Desk LED Display Integration: How to Avoid Visible Gaps、 Uneven Surfaces and Exposed Frames
Can an LED display follow a curved reception desk?
Yes, but the radius must match a supported curved, faceted, or flexible LED system rather than being forced through the mounting frame. With Hotel Front Desk LED Display Integration: How to Avoid Visible Gaps, Uneven Surfaces and Exposed Frames, require the manufacturer to approve the radius, cabinet angles, trim geometry, and content mapping.
A compound curve may require custom modules or a flat display placed behind a curved architectural opening.
Can an existing stone front desk support the LED cabinets?
Not automatically. Stone panels are usually architectural finishes, not engineered display-support structures. For Hotel Front Desk LED Display Integration: How to Avoid Visible Gaps, Uneven Surfaces and Exposed Frames, have a structural professional verify loads, attachment points, and movement between the stone and supporting frame.
An existing desk may need independent steel backing so module removal does not transfer force into brittle stone edges or adhesive joints.
Why does the display look correct to guests but uneven on camera?
Camera artifacts can result from refresh rate, scan method, shutter speed, frame rate, or exposure rather than physical cabinet alignment. Hotel Front Desk LED Display Integration: How to Avoid Visible Gaps, Uneven Surfaces and Exposed Frames should include an on-camera test when the lobby is used for interviews or social media.
Coordinate the camera settings with the processor, and select an LED product designed for filmed environments when recording is a regular requirement.
How should hotel staff clean the display surface?
Staff should follow the display manufacturer’s approved cleaning method and avoid pressing directly on fine-pitch modules. Hotel Front Desk LED Display Integration: How to Avoid Visible Gaps, Uneven Surfaces and Exposed Frames can be damaged by sprayed liquid, abrasive cloths, or vacuum tools touching the LEDs.
In high-contact locations, train housekeeping separately, provide the approved materials, and consider a durable pixel technology or protective surface designed for close public environments.
Who should approve the completed front desk display?
Approval should include the AV integrator, architect or interior designer, general contractor, millworker, electrician, and hotel representative. Hotel Front Desk LED Display Integration: How to Avoid Visible Gaps, Uneven Surfaces and Exposed Frames may also require input from a structural engineer or accessibility consultant.
Each party should sign off only on its discipline, while one coordinated punch list tracks seams, finishes, service access, content performance, safety, and outstanding warranty items.
Conclusion
A seamless front desk display depends more on coordination and precision than on software correction. The strongest results come from controlling the complete assembly from structure to final content.
– Define tolerances early: Document cabinet gaps, surface steps, perimeter reveals, and the finished LED plane.
– Correct the substrate: Survey the full mounting area and provide three-axis adjustment.
– Test progressively: Illuminate and approve each section before expanding the wall.
– Protect long-term quality: Preserve service access, meet accessibility requirements, and record commissioning baselines.
Hotel Front Desk LED Display Integration: How to Avoid Visible Gaps, Uneven Surfaces and Exposed Frames becomes manageable when every trade works from one coordinated section and one acceptance checklist. Your next step is to schedule a preconstruction review with the LED integrator, millworker, architect, and structural contractor before approving fabrication.