How to Diagnose Uneven Seams on Curved LED Displays: Frame, Module and Calibration Checks

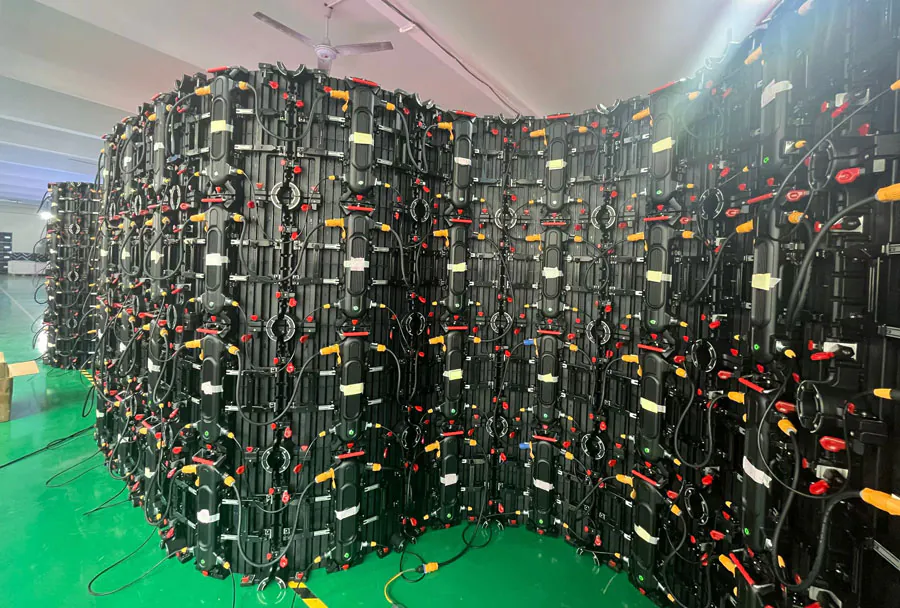
How to Diagnose Uneven Seams on Curved LED Displays: Frame, Module and Calibration Checks starts by separating mechanical alignment problems from module and image-processing faults. One useful benchmark comes from TW VISION’s installation manual, which specifies that the supporting bottom beam should be level within ±1 mm before cabinets are installed. (TW VISION )
Table of Contents
- 1. Verify the Frame Geometry and Curve Settings
- Check the Reference Structure
- Compare Every Curve Lock
- 2. Inspect Module Seating, Magnets, and Cabinet Edges
- Power Down and Reseat the Module
- Use a Controlled Swap Test
- 3. Confirm Mapping, Receiving Cards, and Calibration Data
- Verify the Physical-to-Digital Map
- Compare Calibration States
- 4. Separate Brightness, Color, and Thermal Seams
- Run Diagnostic Patterns
- Calibrate Under Stable Conditions
- 5. Validate the Repair From Real Viewing Positions
- Use a Repeatable Acceptance Test
- Record the Final Condition
- Why does the seam appear on camera but not to the eye?
- Can mixed manufacturing batches create visible curved-display seams?
- What should I check after transporting a rental LED wall?
- Can wind or temperature cause a temporary seam outdoors?
- When should I replace a cabinet instead of recalibrating it?
- Conclusion
Yet a frame can meet that benchmark and still produce visible lines if curve locks are inconsistent, modules sit at different depths, or calibration coefficients do not match. The seam may appear black, bright, colored, or visible only from certain camera positions.
The fastest diagnostic method is to change one variable at a time. You should inspect the structure first, reseat and swap modules second, verify control-system mapping third, and adjust calibration only after the physical surface is correct.
The five checks below provide a repeatable workflow for rental walls, broadcast stages, immersive installations, and permanent curved displays.
1. Verify the Frame Geometry and Curve Settings
Frame geometry should be checked first because software cannot correct a physical gap, twisted cabinet, or inconsistent curve angle. How to Diagnose Uneven Seams on Curved LED Displays: Frame、Module and Calibration Checks therefore begins with the supporting structure rather than processor settings.
Check the Reference Structure
Use a laser level, straightedge, radius template, or survey points to verify the supporting frame before loosening individual cabinets. TW VISION instructs installers to keep the bottom beam within ±1 mm of level and maintain proper joints and flatness as cabinets are installed. (TW VISION )
Inspect the wall from the rear where possible. Look for twisted truss, uneven mounting plates, displaced ground supports, or excessive tension from safety cables and power looms.
Compare Every Curve Lock
Confirm that corresponding locks are set to the same angle and are fully engaged. ROE Visual’s Topaz Curve system, for instance, supports adjustment up to 30 degrees in 1-degree positions, showing why one incorrect lock setting can create a visible break in an otherwise smooth radius. (roevisual.com)
Consider a cabinet whose upper lock is set one position differently from its lower lock. The cabinet may appear aligned at the bottom while opening a tapered seam toward the top.
Run your hand carefully across the powered-off face. A depth step usually indicates a frame, lock, locating-pin, or Z-axis problem rather than calibration.
How to Diagnose Uneven Seams on Curved LED Displays: Frame、Module and Calibration Checks works best when you record each cabinet’s intended angle before making adjustments.
How to apply this: Display a white test image, mark the affected joint, verify its upper and lower curve locks, and measure the frame before changing software.
2. Inspect Module Seating, Magnets, and Cabinet Edges
A seam confined to one module edge usually points to module seating, damaged hardware, or a local depth difference. How to Diagnose Uneven Seams on Curved LED Displays should next isolate whether the fault follows a removable module.
Power Down and Reseat the Module
Follow the manufacturer’s service procedure, isolate power, attach any required safety tether, and remove the suspected module. Inspect:
– Locating pins and guide holes
– Magnetic contact points
– Module shells or backing plates
– Connectors and hub-board sockets
– LED edge damage
– Trapped cables, labels, or debris
Absen’s K V3 documentation describes XYZ three-axis adjustment for improving alignment between cabinets. This is important because a seam can result from depth, horizontal position, or vertical position—not just the visible gap. (absen.com)
Use a Controlled Swap Test
Swap the suspected module with a known-good module of the same model and batch. If the defect moves, inspect the removed module; if it remains, investigate the cabinet, receiving-card output, or calibration data.
A common scenario is a replacement module sitting slightly proud because one magnet is loose or a locating pin is bent. Tightening surrounding cabinets will not solve that local seating fault and may distort the larger curve.
The official TW VISION manual tells installers to “keep flatness among the modules” during installation, confirming that module-level flatness is a required mechanical check rather than a cosmetic preference. (TW VISION)
Use a nonmetallic straightedge across neighboring modules when the product permits it. Do not press directly on LED packages or force a module into a distorted cabinet.
How to Diagnose Uneven Seams on Curved LED Displays becomes faster when every swap is photographed and logged by cabinet position.
How to apply this: Reseat one affected module, swap it with a known-good unit, and note whether the seam moves, disappears, or remains stationary.
3. Confirm Mapping, Receiving Cards, and Calibration Data
A seam that stays perfectly aligned with a cabinet or receiving-card boundary may come from mismatched configuration data. How to Diagnose Uneven Seams on Curved LED Displays must therefore include a configuration audit before manual color correction.
Verify the Physical-to-Digital Map
Confirm that the software canvas matches the real cabinet order, orientation, data direction, and receiving-card topology. A cabinet can display the correct image while using the wrong calibration file or module coordinates.
Use identification or beaconing functions to confirm every physical cabinet. Do not assume that a successful image test proves the topology is correct.
Compare Calibration States
NovaLCT is NovaStar’s configuration application for setting up displays, managing receiving cards, and handling calibration coefficients. Its seam-adjustment interface provides four calibration choices: off, chroma, brightness, and full-grayscale calibration. (oss.novastar.tech)
Check whether the affected area has:
– Calibration disabled
– A different coefficient database
– Coefficients erased or reset
– A replacement receiving card
– Module flash communication errors
– Configuration copied from another cabinet type
In one case, a newly serviced cabinet may inherit default coefficients while surrounding cabinets retain factory calibration. The resulting boundary can resemble a physical seam even when the modules are flush.
NovaStar advises users to back up the calibration database before coefficients are erased. Its documentation also distinguishes screen databases tied to pixel coordinates from cabinet databases tied to cabinet numbers. (oss.novastar.tech)
How to Diagnose Uneven Seams on Curved LED Displays: Frame、Module and Calibration Checks should preserve existing coefficient files until you confirm that they are the cause.
How to apply this: Back up the current configuration and coefficients, identify the affected cabinet in software, and compare its calibration state with both neighbors.
4. Separate Brightness, Color, and Thermal Seams
Calibration should be adjusted only after the surface, mapping, and module seating have passed inspection. How to Diagnose Uneven Seams on Curved LED Displays: Frame、Module and Calibration Checks uses controlled test patterns to identify which image property is inconsistent.
Run Diagnostic Patterns
Test the wall using black, low gray, mid-gray, white, red, green, and blue images. Reduce ambient lighting if the display is indoors, but retain enough light for safe access.
Interpret the results carefully:
– A black gap visible when powered off is mechanical.
– A line visible mainly on white is often brightness-related.
– A colored line may indicate chroma or temperature variation.
– A low-gray seam can point to grayscale or driver behavior.
– A fault that changes as the wall warms may be thermal.
NovaStar’s calibration system captures screen brightness and chroma with a camera and divides large screens into multiple areas because camera resolution limits the measurable region. (novastar.tech)
Calibrate Under Stable Conditions
Allow the display to reach its normal operating state before final measurement. Keep the camera perpendicular to the target region, control reflections, and avoid mixing measurements taken at different temperatures.
Brompton Tessera provides processing and panel-management tools, while OSCA supports on-screen color adjustment for compatible systems. Brompton states that its adjustments can be stored in a panel’s calibration module, allowing the settings to remain with that panel. (bromptontech.com)
An important exception is heat-related cyan patterning. Brompton explains that red LED brightness can decline more than green and blue as panels warm, producing visible thermal artifacts on supported panel types. (bromptontech.com)
How to Diagnose Uneven Seams on Curved LED Displays: Frame、Module and Calibration Checks requires identical operating conditions when comparing neighboring areas.
How to apply this: Warm the wall to its normal operating condition, run solid-color and grayscale patterns, and classify the seam before applying corrections.
5. Validate the Repair From Real Viewing Positions
A successful repair must hold across content, brightness levels, viewing angles, and camera positions. How to Diagnose Uneven Seams on Curved LED Displays: Frame、Module and Calibration Checks should end with validation rather than stopping when one test pattern looks acceptable.
Use a Repeatable Acceptance Test
Inspect the repaired area from the intended audience position, both ends of the curve, and any important broadcast-camera positions. Curved displays can appear uniform from the center while exposing a joint at an oblique angle.
Run at least three operating states:
- Low-gray content for driver and grayscale differences
- Full white for brightness and mechanical shadowing
- Normal video for real-world confirmation
Check the display once after warm-up and again after an extended operating period. Do not hide a physical fault with aggressive seam-brightness correction, because the compensation may become obvious when content or temperature changes.
Record the Final Condition
The following table helps you convert seam behavior into the next action.
| Observation | Likely source | Action to take |
|---|---|---|
| Visible when off | Physical gap | Realign frame or locks |
| Fault moves in swap | Module | Repair or replace module |
| Fixed to cabinet | Data or frame | Check mapping and geometry |
| White-only line | Brightness | Compare coefficients |
| Colored boundary | Chroma | Measure and recalibrate |
| Changes when warm | Thermal | Test at operating temperature |
A practical final check is to photograph the same pattern from fixed positions before and after repair. Keep exposure and white balance locked so automatic camera adjustments do not conceal differences.
How to Diagnose Uneven Seams on Curved LED Displays is complete only when the correction remains stable under representative conditions.
How to apply this: Save the final files, capture reference photos, and document the corrected cabinet, module, angle, and calibration state.
Frequently Asked Questions About How to Diagnose Uneven Seams on Curved LED Displays: Frame、Module and Calibration Checks
Why does the seam appear on camera but not to the eye?
Camera-only seams can result from shutter timing, refresh behavior, scan patterns, moiré, or different grayscale performance between modules. Change the camera shutter angle or frame rate before rebuilding the display.
When using How to Diagnose Uneven Seams on Curved LED Displays for a broadcast wall, test with the production camera because a phone recording may show different artifacts.
Can mixed manufacturing batches create visible curved-display seams?
Yes. Modules from different production batches may use LEDs with slightly different optical or electrical characteristics, even when their model numbers match. A spare module may therefore look uniform on white but differ on low gray or saturated colors.
How to Diagnose Uneven Seams on Curved LED Displays should include batch records and factory coefficient files whenever replacement modules are installed.
What should I check after transporting a rental LED wall?
Inspect locating pins, curve locks, module corners, magnets, connectors, and cabinet frames before applying power. Transportation can shift an adjustable lock or deform an exposed edge without producing obvious external damage.
For How to Diagnose Uneven Seams on Curved LED Displays after transit, compare every lock against the build plan instead of copying the setting from the nearest cabinet.
Can wind or temperature cause a temporary seam outdoors?
Yes. Wind loading, direct sunlight, rain exposure, and uneven heating can temporarily change cabinet alignment or color performance. One side of an outdoor curve may heat faster while the supporting structure expands at a different rate.
When applying How to Diagnose Uneven Seams on Curved LED Displays: Frame, Module and Calibration Checks outdoors, inspect the wall under expected operating conditions and follow the engineered wind-management plan.
When should I replace a cabinet instead of recalibrating it?
Replace or professionally repair the cabinet when it is twisted, cracked, unable to hold its curve setting, or repeatedly forces modules out of plane. Calibration cannot correct a changing physical surface.
How to Diagnose Uneven Seams on Curved LED Displays may confirm that the defect remains after module swaps and data checks, making cabinet replacement the safer long-term solution.
Conclusion
Uneven seams should be diagnosed in a fixed order so one correction does not conceal another fault.
– Verify the frame first: Check support level, cabinet depth, curve angles, pins, and locks.
– Isolate the module: Reseat and swap modules to determine whether the defect moves.
– Protect configuration data: Back up mapping and calibration files before changing coefficients.
– Validate under real conditions: Test multiple patterns, viewing positions, cameras, and operating temperatures.
How to Diagnose Uneven Seams on Curved LED Displays is most reliable when mechanical alignment, module condition, system mapping, and calibration are treated as separate diagnostic layers.
Start by displaying a full-white image and marking every visible joint. Then power down safely, inspect the first affected cabinet, and record what changes after each adjustment.
Related Articles
- How to Test Movie Image Quality on a Home Theater LED Screen Before Buying
- When Should an AV Rental Business Buy Its Own LED Display
- Indoor LED Screen Atlanta: 5 : Complete Buying Guide